Finally! It’s finally time to start next summer’s tomato sauces, salsas, steamed greens, and jellies. True, the first tomatoes won’t be ripe until late July, but now’s the time to get those plants started.
Starting your vegetable plants from seeds is not rocket science, but it does take a little bit of planning. Fortunately, all you need for that are pen and paper.
There are loads of excellent books and articles on this fun topics. The Seed Starters Handbook, put out by the Seed Savers Exchange is excellent. You may also want to check into the current issue of Mother Earth News.
Is it worth the trouble? It certainly has been for me. I began starting my tomatoes, peppers, eggplant and leeks nearly 30 years ago, when I gardened in Minneapolis. Every year, my plots got larger as I discovered interesting varieties: purple snap beens, red and yellow lettuces, 16-oz paste tomatoes, leeks that I could harvest from beneath the snow in deep winter, and more.
As I start my seeds, I work with two principles that have served me well over time:
- Seeds need warmth and darkness to sprout
- Seedlings need lots of light and cool temperatures to grow into healthy, stocky transplants
Here’s what I gathered last week to start my hot pepper seedlings:
- Shallow plastic containers. They only need to be 2 inches deep but can be of any shape. Used raspberry and blueberry trays work well. I worked with a tray that measured roughly 8″x8″ and is about 2″ deep.
- A bag of vermiculite. This light-weight, grainy gray substance is often added to potting soil to lighten its texture and help retain moisture. You can find it at any garden center. I use this as my starting medium for several reasons: because seeds don’t need soil to germinate, because you can start lots of seeds in a tiny space using vermiculite, and because you can pull tiny seedlings from vermiculite and not hurt the tender roots. Do not use perlite.
- A heating pad. If you don’t have one, use a large cooler in combination with something that’ll radiate heat over an extended period of time, such as a brick or one of those pads that you can heat up in your microwave. Why? Because seeds prefer warmer temps – 75-90 degrees -for sprouting.
- Seeds
- Pen and paper
Seed Starting – Step by step:
- I labeled the front of the tray with a number or letter. This helps avoid confusion as the seeds start to sprout.
- I punched several drainage holes in the plastic.
- I poured 1.5-2″ of vermiculite to the tray.
- I carefully pushed the seeds 1/4″ into the vermiculite, and immediately recorded this on a sheet of paper.
- Now came a really fun part. I filled the kitchen sink with an inch of warm water and carefully lowered the tray into it. Within a minutes or two, the vermiculite pulled water up into the tray. I could tell the vermiculite was saturated because it darkened as it got wet.
- I emptied the sink and let the tray sit and drain for a few minutes.
- I wrapped the now water-heavy tray loosely in a plastic bag and set the tray on the heating pad set to its lowest level. I placed an old towel between the tray and the heating pad just to make sure I wasn’t going to cook the seeds.
- I placed a single sheet of old newspaper over the tray. (Sprouting seeds prefer the dark.)
- I checked the tray every day: to make sure it wasn’t dried out, to pull back the plastic bag and give the vermiculite some fresh air, and to make sure it wasn’t over-heating.
By day 4, many of the pepper seedlings had emerged! Even though more than half were still below the surface, I moved the tray to a cool room and immediately put them under a florescent light bulb. Nothing fancy, just a bulb that I kept just one inch above the top leaves. If you’ve ever had leggy, spindly seedlings, lack of light is probably the reason. A sunny window just doesn’t deliver enough light for these little guys.
Well, that was a week ago. Tomorrow I’ll try to do two things: start my tomato seeds, and transplant the peppers from vermiculite to soil. Things are moving fast!!
What will you be growing this season?
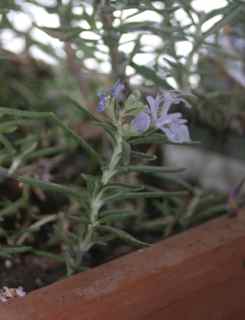
Photo: Thyme flowering on my window sill
Comment